

In this article, I will discuss how to write your first Namaste World app in react native, after all, that's what we programmers do first and foremost.
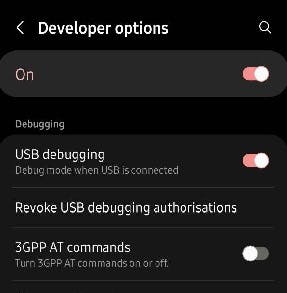
I will be using the android emulator for my purpose you could also use any old android device with USB debugging enabled from developer options.
NOTE: check if adb is a recognized command in your terminal by typing adb --version
Check out if your device was detected using the following command in the terminal
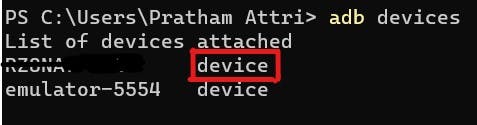
If the text marked in the red box is "unauthorized", then it means that you haven't enabled the USB debugging mode from Developer Options.
Let's start with the app now...
STEP 1: Open the terminal and navigate to the directory where all your projects will be stored. Then run this command
npx react-native init newApp01STEP 2: Change the directory to newApp01 and open it in vs code
cd .\newApp01\ ; code .In the android folder, create a new file with the name
local.propertiesand type the following lines in it and save itsdk.dir=C\:\\Users\\[YOUR USERNAME]\\AppData\\Local\\Android\\SdkThis is the path to android SDK tools
STEP 3: Open the App.tsx file and replace all the code inside it with the following lines
    import React from 'react';
    import {SafeAreaView, View, Text} from 'react-native';

    const App = () => {
      return (
        <SafeAreaView>
          <View>
            <Text>Namaste World!</Text>
          </View>
        </SafeAreaView>
      );
    };

    export default App;
Let us understand this code:
| REACT NATIVE | HTML | COMMENT |
| View | div | They are similar to each other in terms of wrapping the other elements |
| Text | p | Used to add text inside the application |
| SafeAreaView | -- | This is used to render content within the safe area boundaries of a device i.e. the notches are taken into consideration here. |
The App method is used to render the UI elements just like in a basic react app. Note that the return statement inside the App method is necessary since without it nothing would be rendered on the screen.
STEP 4: Go back to the terminal, check if you are in your app's directory, and type
npm run android
And your first app will be up and running... Congrats!
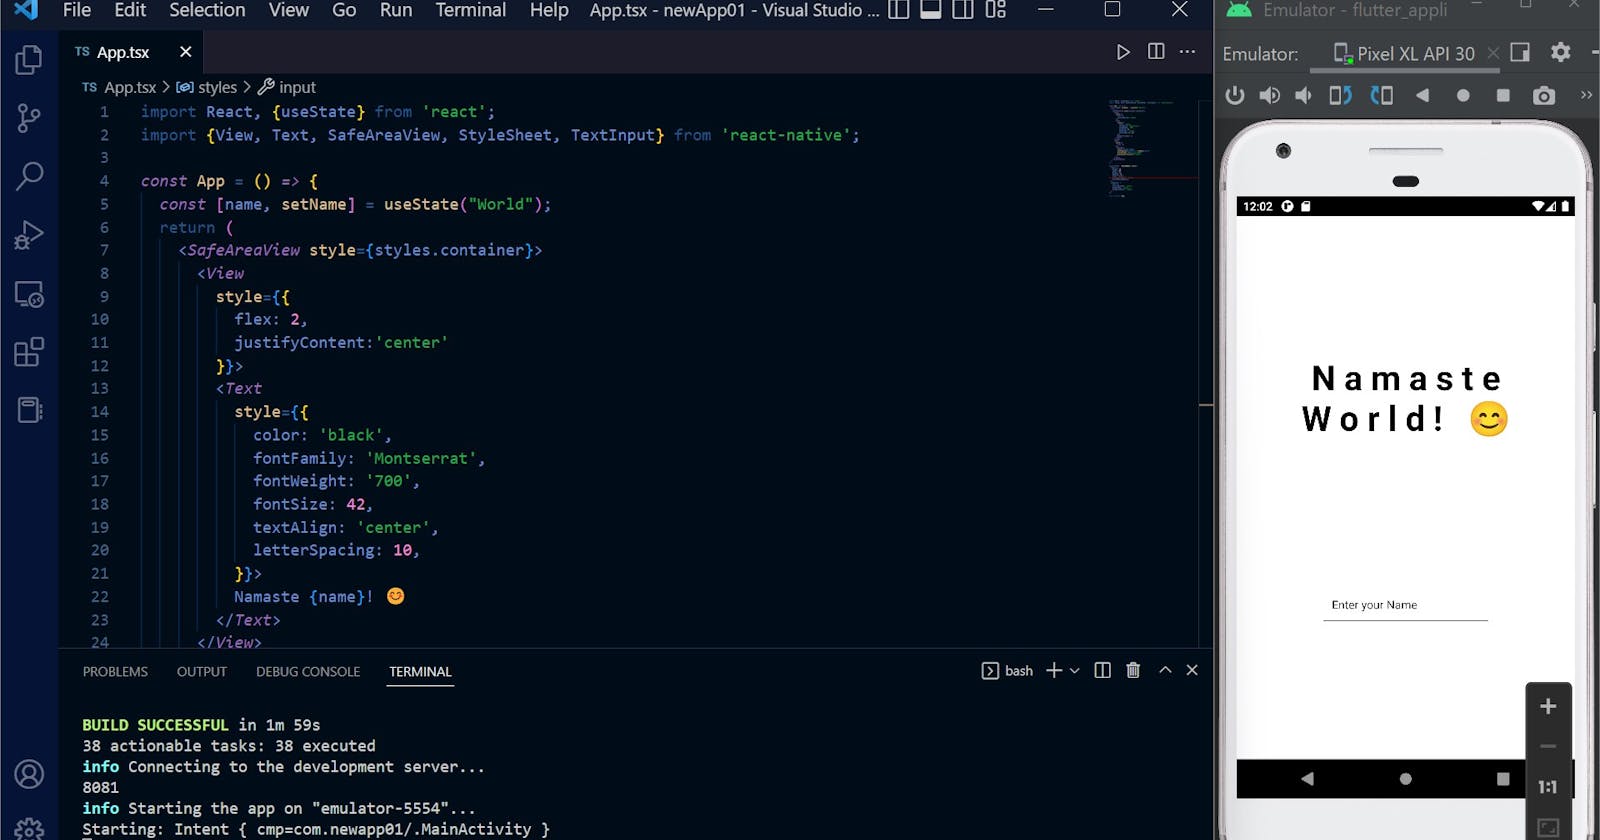
Check out my app which I made using this basic knowledge and some pre-knowledge of front-end development with react. Just copy and paste the following code and save it, changes will automatically display on your app.
import React, {useState} from 'react';
import {
    View,
    Text,
    SafeAreaView,
    StyleSheet,
    TextInput
} from 'react-native';

const App = () => {
  const [name, setName] = useState("World");
  return (
    <SafeAreaView style={styles.container}>
      <View
        style={{
          flex: 2,
          justifyContent:'center'
        }}>
        <Text
          style={{
            color: 'black',
            fontFamily: 'Montserrat',
            fontWeight: '700',
            fontSize: 42,
            textAlign: 'center',
            letterSpacing: 10,
          }}>
          Namaste {name}! 😊
        </Text>
      </View>
      <View
        style={{
          flex: 1,
        }}>
        <TextInput
          style={styles.input}
          onChangeText={(text) => setName(text)}
          placeholder="Enter your Name"
          placeholderTextColor="black"
        />
      </View>
    </SafeAreaView>
  );
};

const styles = StyleSheet.create({
  input: {
    height: 40,
    width: 200,
    margin: 12,
    padding: 10,
    color: 'black',
    borderBottomColor:'black',
    borderBottomWidth:1
  },
  container: {
    flex: 1,
    justifyContent: 'center',
    alignItems: 'center',
    backgroundColor: 'white',
  },
});

export default App;
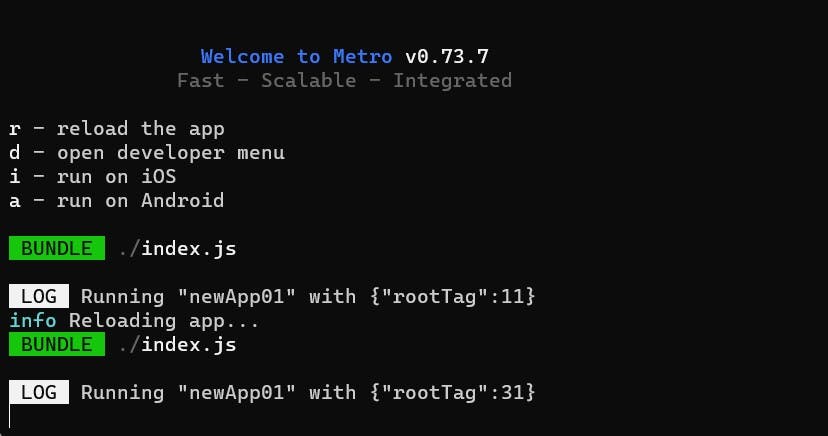
If the change doesn't get displayed in your app then press r after opening the window similar to the one below. It'll refresh the app on your device.
THANK YOU...